
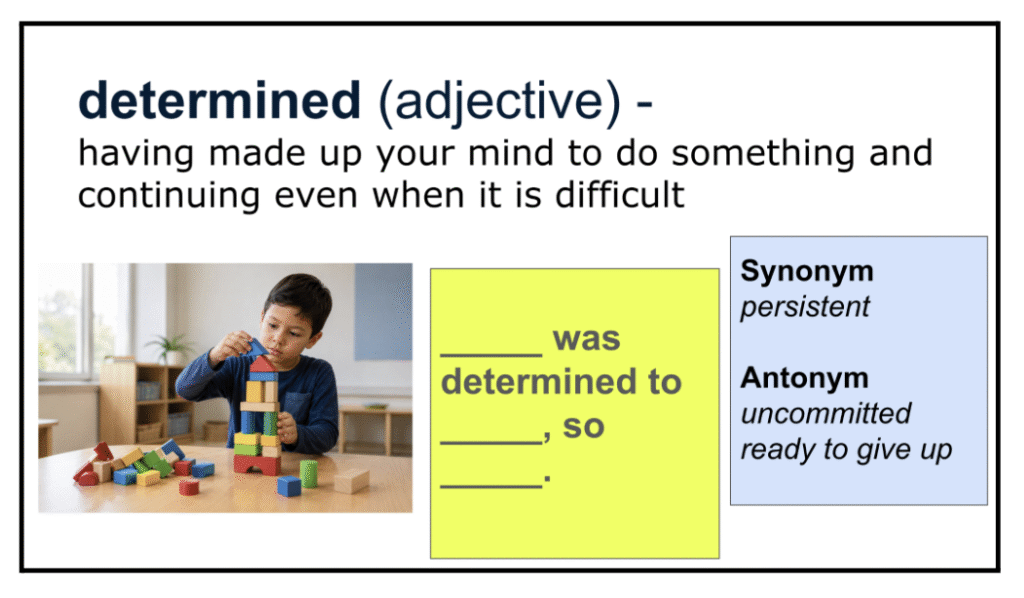
Determined. Confident. Despondent. Collaborative. Majestic. These are Tier Two words – words students can use across the day whether they are discussing a character in a novel or what happened on the playground or how they are feeling about solving a math problem (Beck & McKeown, 2013). Teaching words like these in a simple, consistent way can elevate students’ vocabulary. Based on my review of the research and my work in schools (with high populations of students learning English), I recommend this five-step routine:
- Analyze the word’s sounds or meaningful parts.
- Define it in kid-friendly language.
- Associate it with related words or images.
- Connect it to students’ experiences.
- Link it to instructional content.
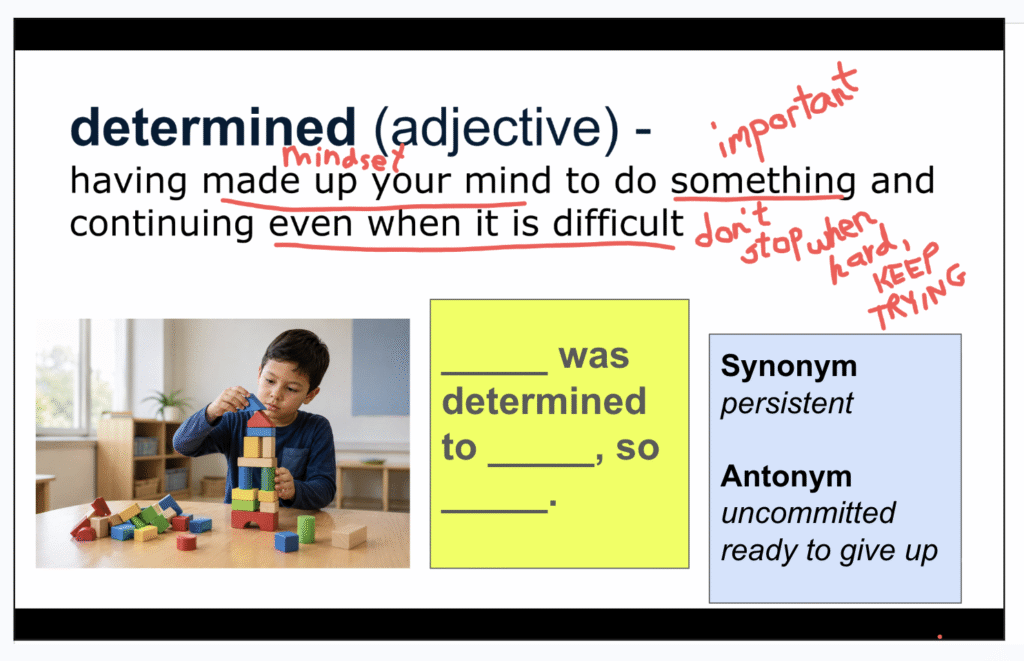
The teachers I work with project a slide like the one above for all students to view. Here is a deck with dozens of examples. What follows are a few suggestions for implementing each step.
Step 1 Analyze
Position students as problem solvers. In other words, DON’T SAY THE WORD. Ask students to look carefully at the word to figure out how to decode it. They can use a strategy you have taught them like chunking or looking for morphemes they know. For the word determined, I’d ask, “What can you do to figure this word out?”
Step 2 Define
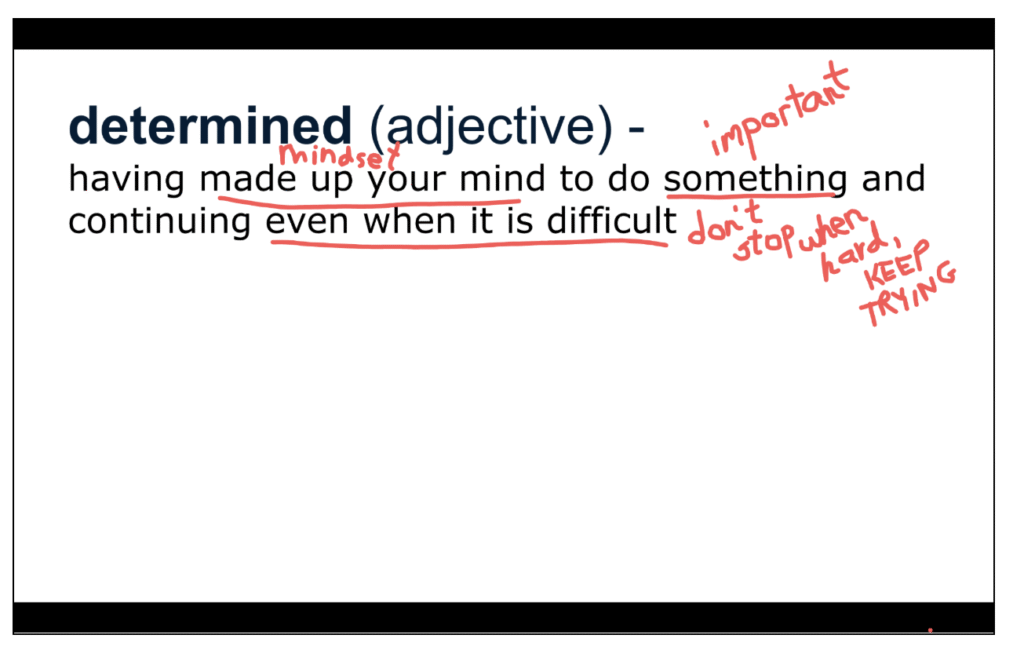
Engage students in actively making sense of the definition. Begin by reading aloud the definition. Then ask students to read aloud with you. Next ask students to read to themselves and think about a word or phrase in the definition that resonates with them or that will help them remember the meaning of the word. You might say, “As you read this to yourself, identify a word or phrase that will help you remember the meaning of this word.” Ask a few students to share their thinking. As they share, underline key words and jot annotations. Below you can see possible annotations for the word determined.
I DO NOT recommend asking students if they know what the word means. While this is appropriate in other contexts, it may eat up precious time in this context. Instead, you might ask for thumbs-up, thumbs-sideways, or thumbs-down regarding how well they know the meaning of the word.
Step 3 Associate
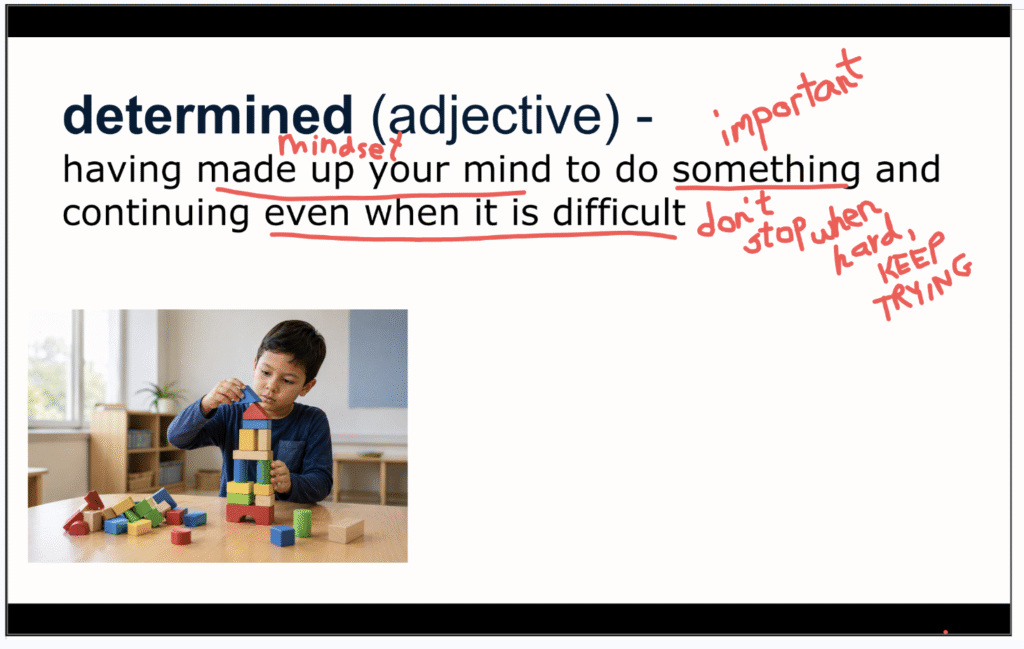
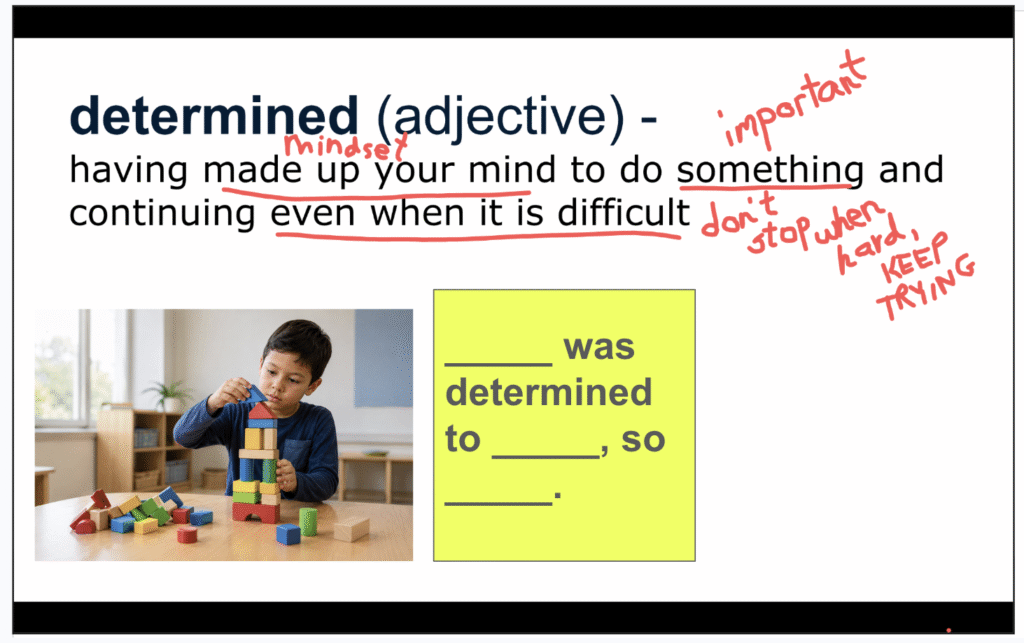
Include two important scaffolds – an image and a sentence frame. Both will make the meaning of the word and the use of the word more accessible to students, especially students learning English. To begin this step, introduce the image and briefly discuss its connection to the word. For this example, you might say, “I chose this image because it shows a boy building a tower of blocks that might easily fall over. He seems determined to build this tower even though it might be difficult to get the pieces to balance and not fall.”
Then introduce the sentence frame. Read the frame aloud and ask students to read it with you. Then give an example. For this example, you might say, “The boy was determined to build a tower of blocks, so he placed each block on top of the next very carefully.”
Step 4 Connect
Nurture students’ listening skills and oral language development by asking them to think-pair-share-respond. This means that after Partner A shares, Partner B needs to respond in some way. They might say, “I heard you say….” or “Your sentence makes me think about…” Only after Partner B responds does Partner B share their example. Then Partner A needs to respond. For more examples of how partners might respond, see these collaborative language frames.
Share synonyms and antonyms. During a review later, you might substitute one of the synonyms for the target word in the sentence frame (if that works). When you review the words, you can return to these words to help students build networks of words.
Step 5 Link
Tell students WHY you have taught them this word so they see the purpose in learning this word. It may be that they can use the word to describe a character in a mentor text you are reading aloud. It may be a word in a text they are going to read. It may be that they can use the word in an essay they are writing.
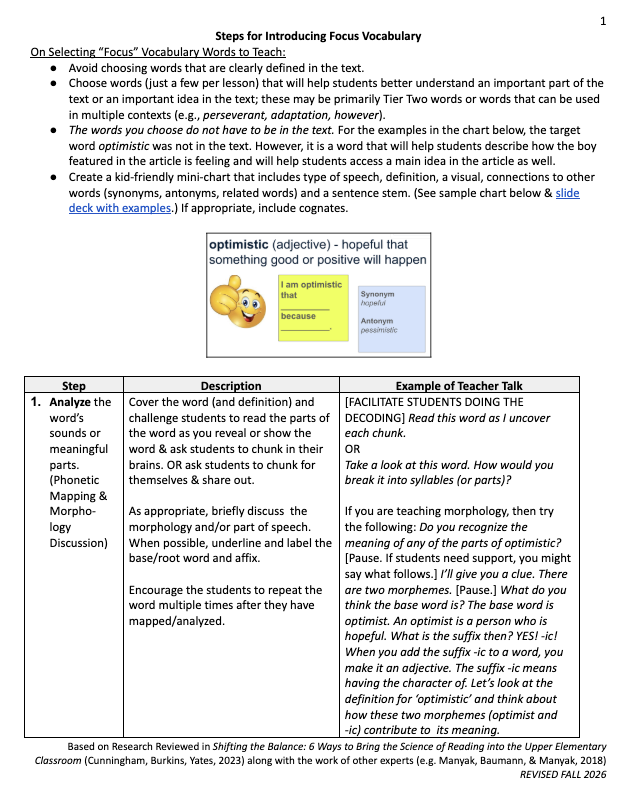
This is an easy routine that gets faster if you use it on a regular basis. Here’s a handout with the five-step routine explained.
There’s so much more I’d like to write about this routine—how to choose words to teach, the components of a good slide, and how to review words. I’ll explore these topics in future blog posts.
A HUGE thank you to all of the teachers who have helped me refine these steps over the years!