“Why can’t I just highlight? Why do I have to annotate?” Ever heard this from a student? I don’t have to convince you of the value of annotating, but we do need to remind (and even persuade) students that annotating a source can help us monitor for meaning. Annotating can help us make sense of the details and remember what we read. If we can understand and remember what we read, then we are more likely to be able to engage in critical thinking.
I had the honor of teaching a class of 5th grade students with this objective in mind. These students were studying the conservation of matter in science so I located a NEWSELA article that described condensation, boiling, and evaporation. What follows is a description of this three phase lesson.
Phase 1 Meet the Source + Conferences to Assess “Are they recalling key details? Are they able to explain what they are learning?”
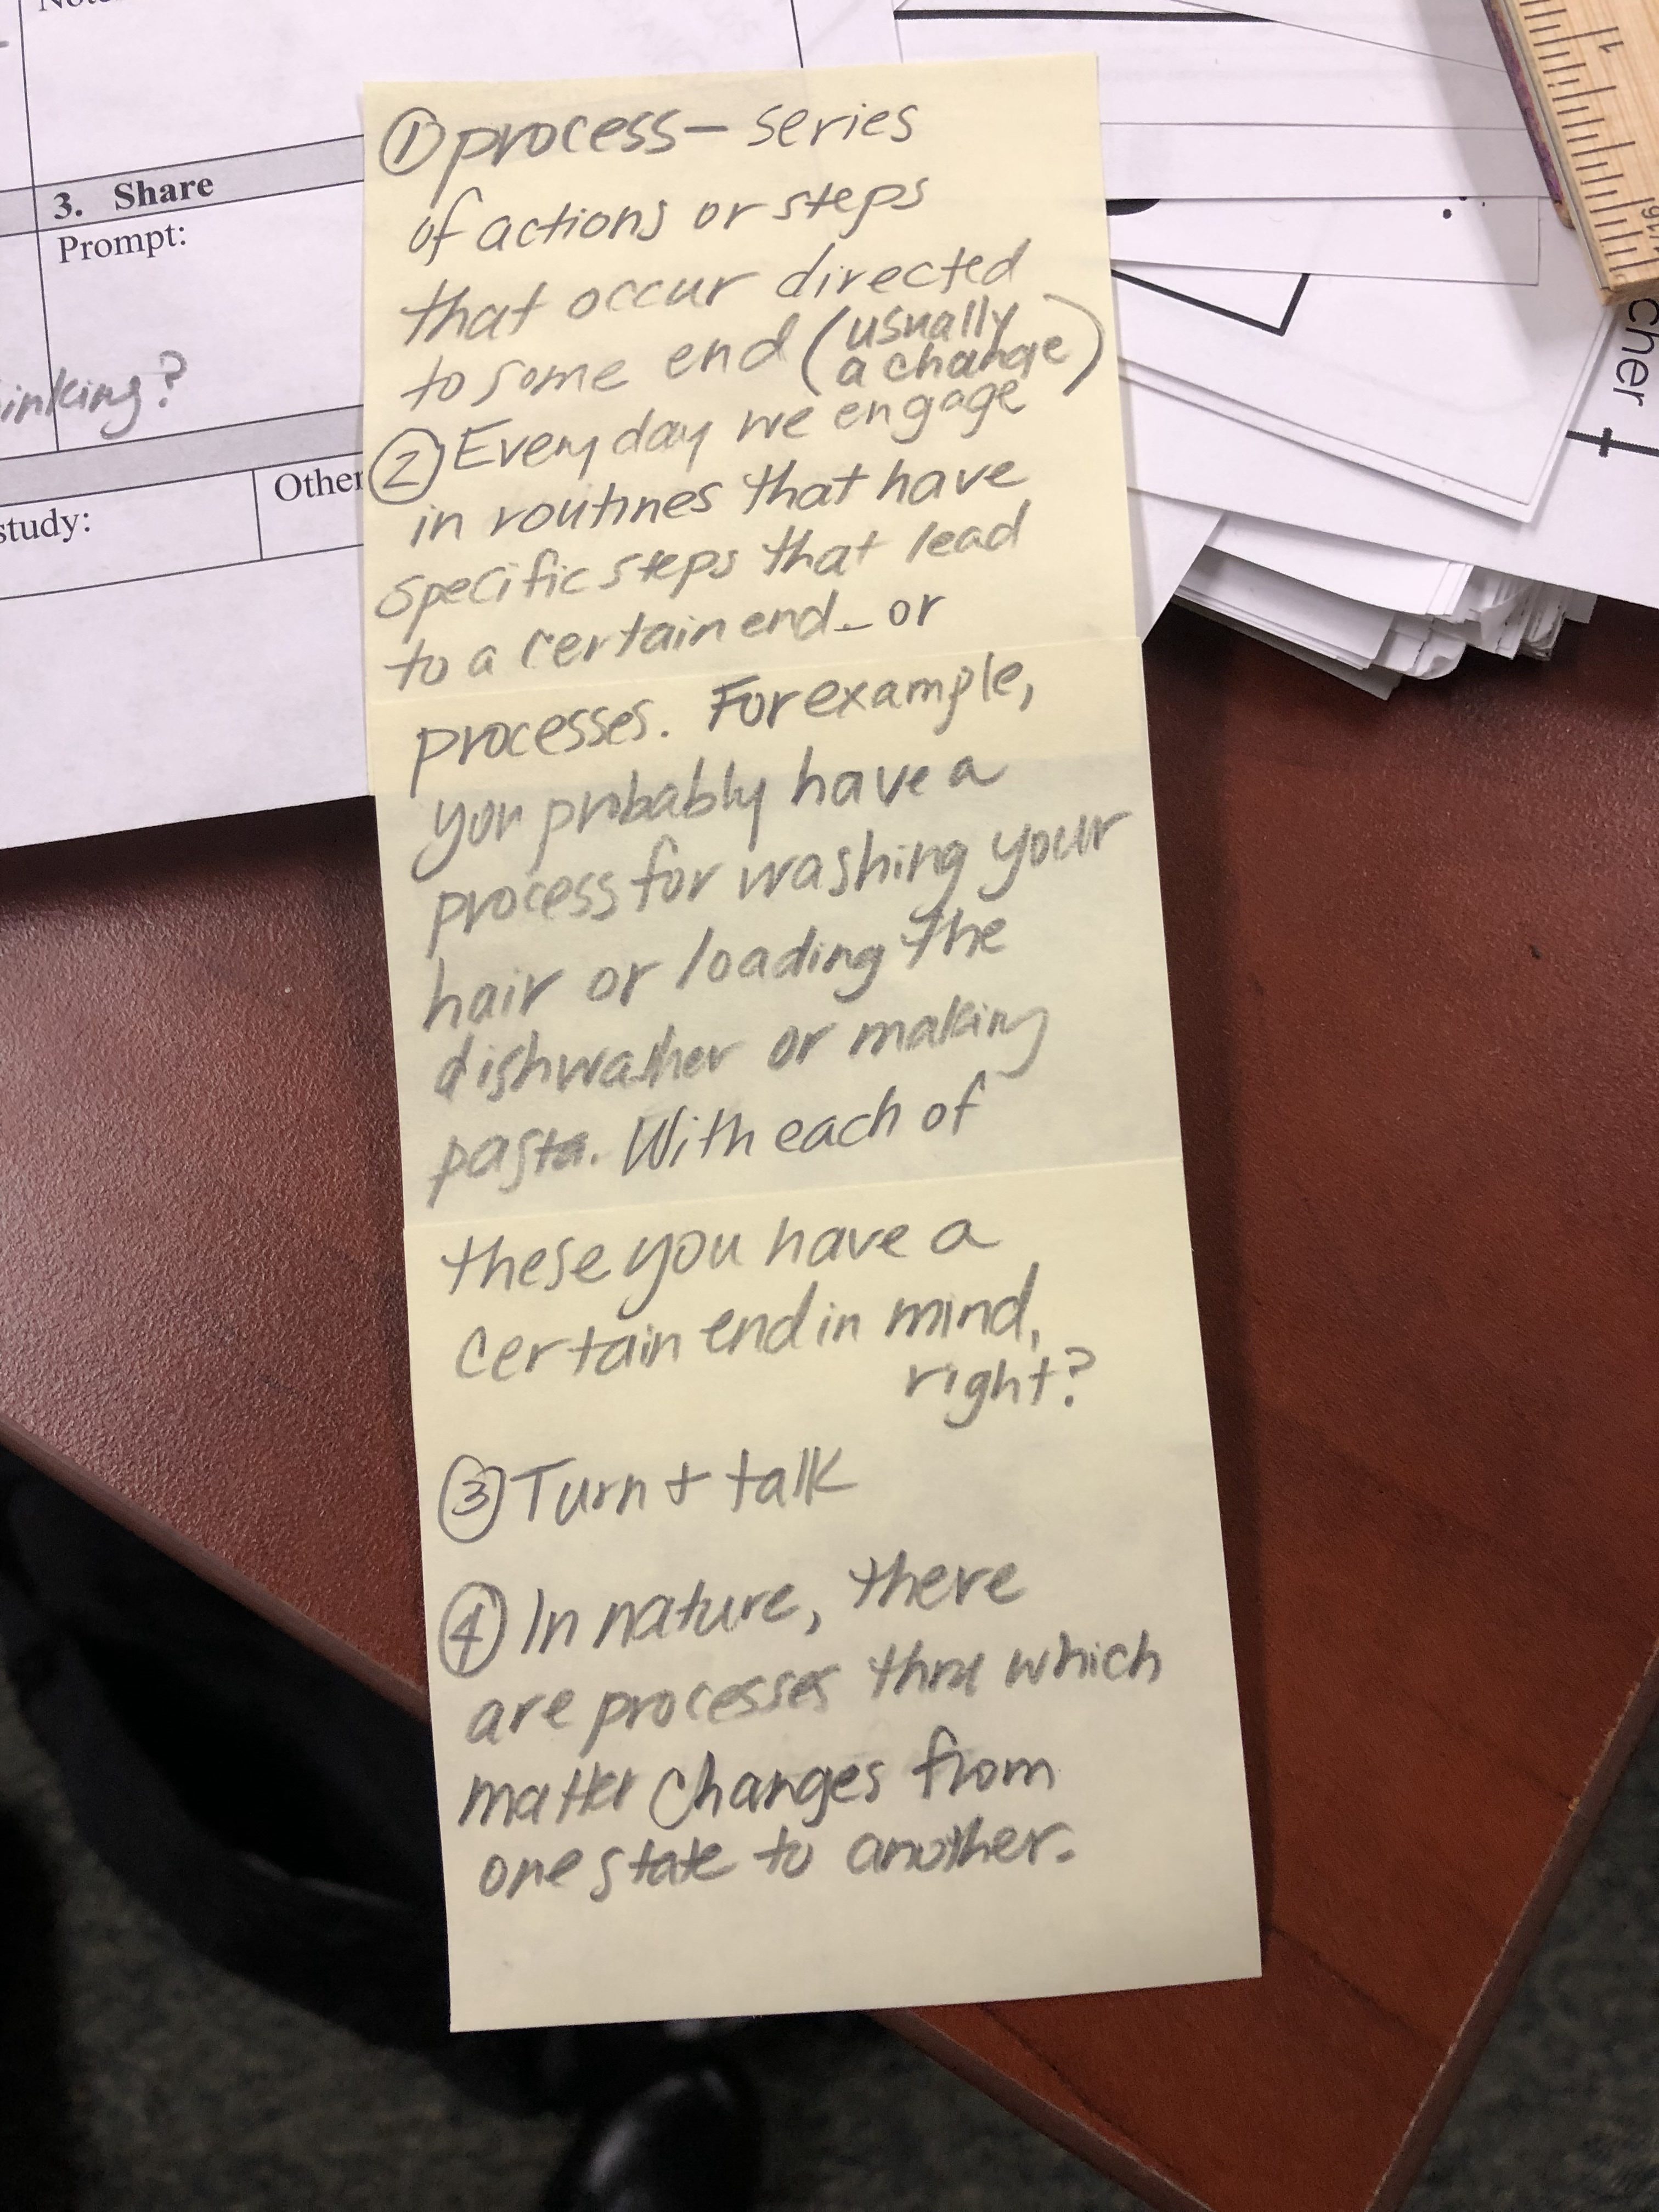
To start I introduced the vocabulary word “process” — a word that is located in the source. Understanding this word helps a reader understand many parts of this source better. I followed four steps: define, associate, turn & talk, connect to the source.
Then we briefly previewed and made predictions. I gave them a purpose for reading, “You have been studying condensation and evaporation in science. As you’re reading, I want you to think about new information you are reading that you can add to what you already know.” I encouraged them to put a + sign by new info, but to not spend energy on annotating yet.
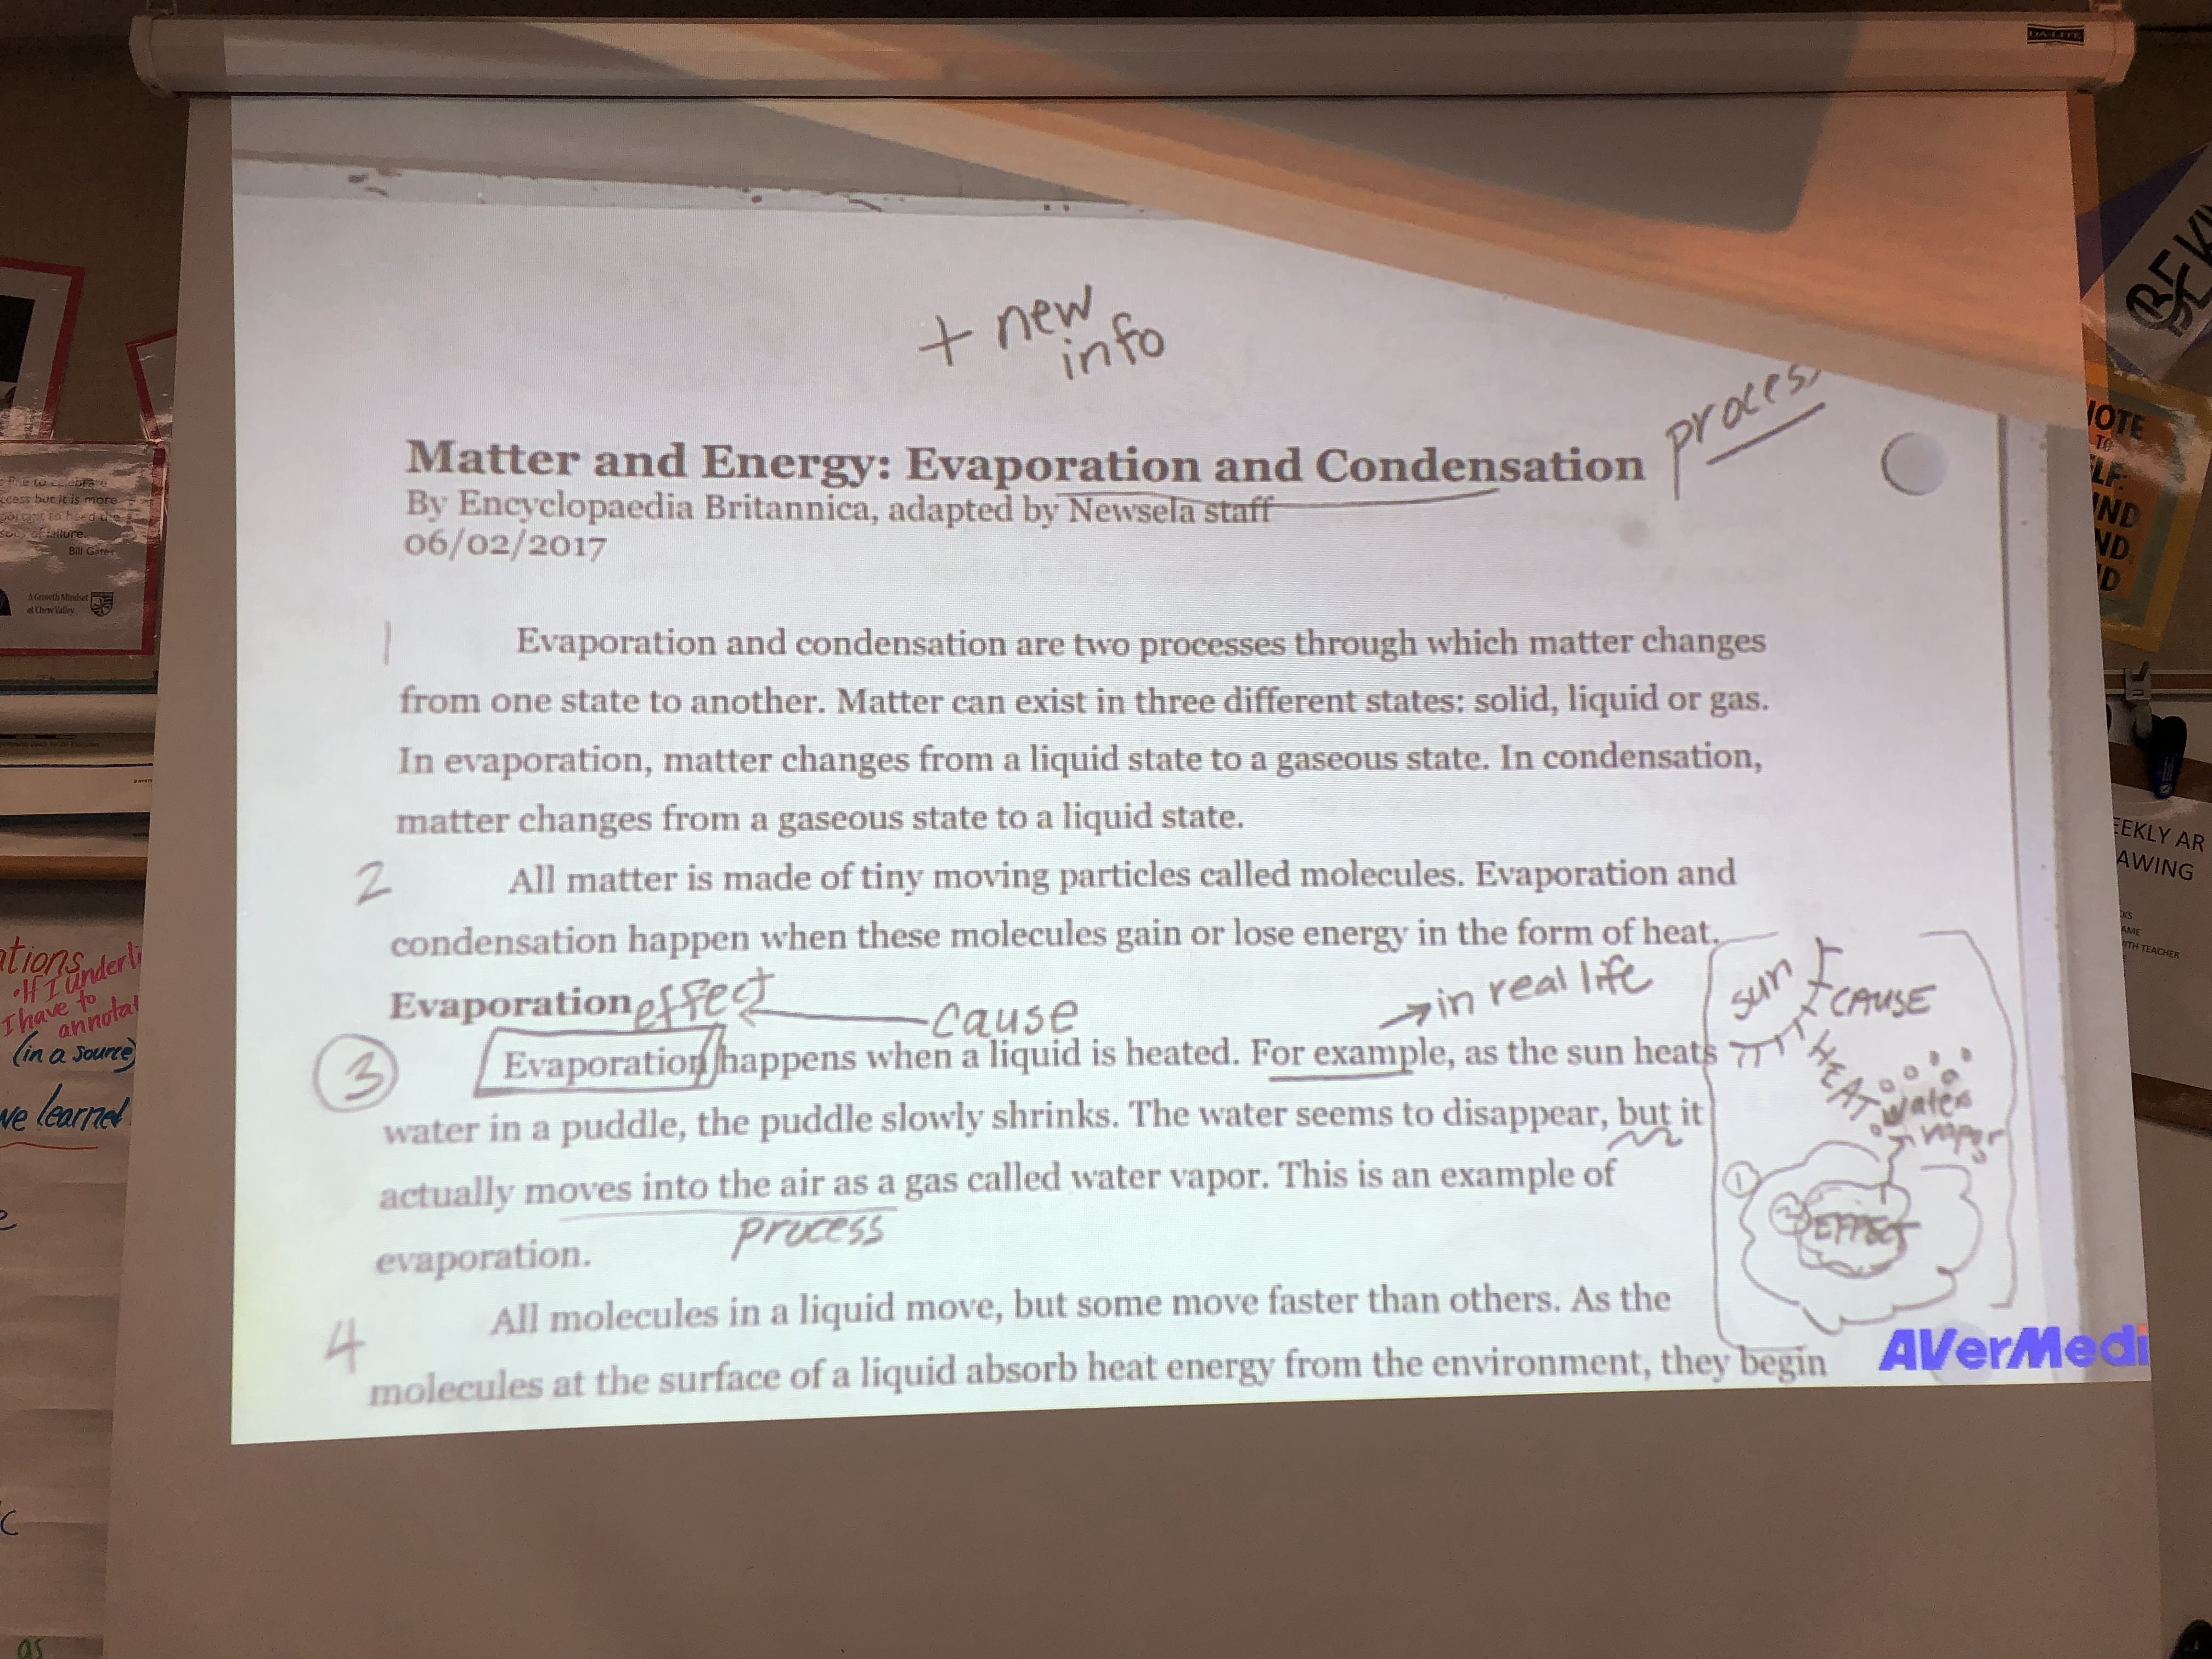
As the students read the article, I leaned in to confer (and assess). I noticed that while several individuals were able to name the topic they’d read about and give a few general details, they were not describing, in detail, what they’d learned. One student seemed very confident. He’d pushed the article away and was on to other things. When I leaned in, he informed me that he’d read the article twice and, basically, understood it all. I asked him to describe to me the process of evaporation and noticed he was probably drawing from his background knowledge to respond because there was no connection to the text in what he said. Then I asked him to describe to me how the author explained evaporation. (The author uses a real life example of a puddle of water that appears to be shrinking but in reality…) The student had nothing to say, could not recall how the author did this. Together we went back and reread and discussed.
I closed by asking them to turn and talk with a partner about a new piece of information they’d learned from the article.
What I’d learned during the reading conferences, confirmed for me that annotating to make sense of and recall details would be helpful to many of the students.
Phase Two Meet the Strategy – Annotating to Understand Better And Me Playing the Part of a Striving Reader in Front of the Class 😉
During Phase 2, I started by asking one student to come up and be the teacher while I pretended to be a student. I handed him a sticky note with a prompt a teacher might use to check for understanding – “Describe the process of condensation that you learned about in this article.” I asked him to ask me this question. When he did, I paused and looked out at the group with a bewildered look. I said, “Well, I think it’s about how water goes up in the air.” I looked at the students and said, “There was a lot of information in this article and that’s all I can really recall. If a teacher asked you this question, would you have difficulty recalling much more than this?” Most of the students agreed enthusiastically – “YES!!!” While we were laughing at me for not remembering more, we were also making it okay to say, “Hey, I need to go back and read and think through important parts closely to make sure I understand what I read and remember what I learned.”
Then I introduced an anchor chart with the question “What are types of annotations we can use to help us make sense of details (in a source) and remember what we learned?” (See below.)
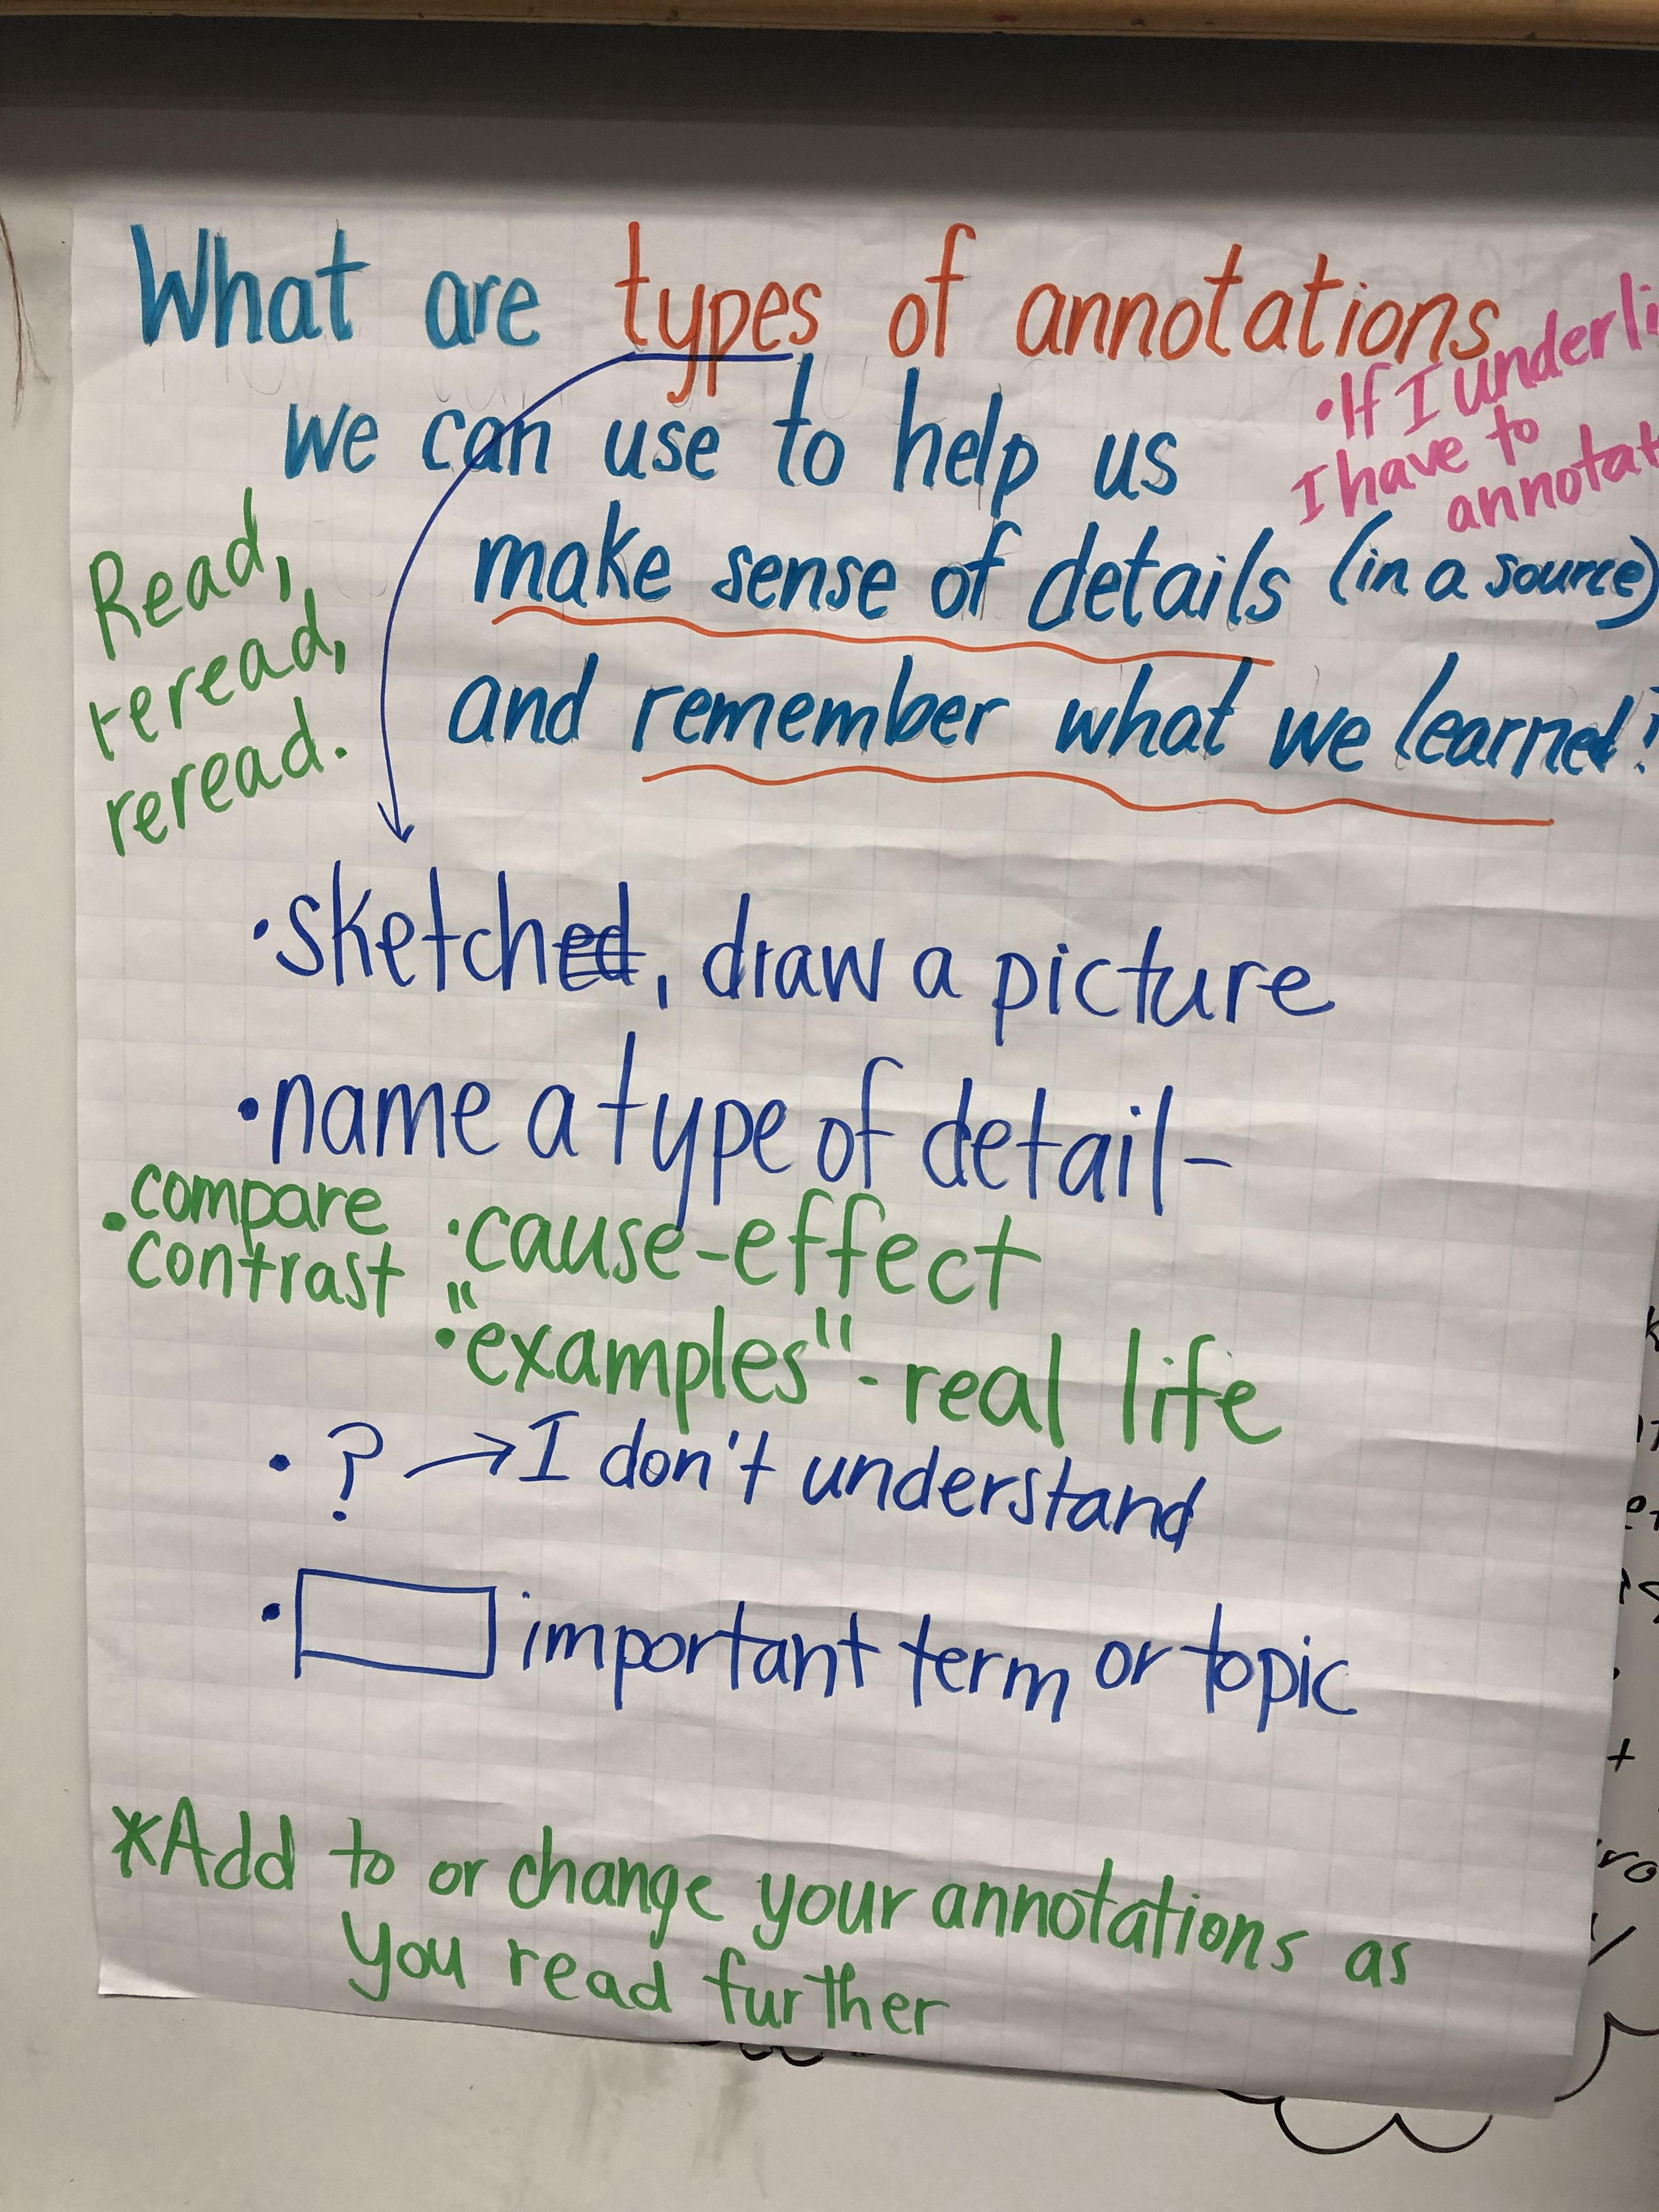
I modeled thinking through a sentence in the source (with the article on a doc camera) and annotating. Then we collaborated on deciding what to underline and jot down in the margins. As we annotated, we stopped and thought about what kind of annotation we’d made and began to list these types of annotations on the anchor chart. The students gave annotating with a partner a go. I quickly realized, that for many, they would need lots of additional opportunities with the teacher as a guide. Still there was good conversation about what they might jot down to help them make sense of the source. In the end, we only closely read and annotated two short paragraphs and that was plenty!!!
I closed by asking the student who’d played the teacher earlier in the lesson to come back up and ask me the same question. I modeled using my annotations to explain what I’d learned:
I learned that evaporation happens when a liquid is heated in some way. The water molecules at the surface of the water start moving more quickly and they break away from the other molecules and move into the air as a gas. Evaporation is the effect and the liquid being heated in the cause. The author used a real life example–a puddle of water and what happens to the water to help me understand how this happens every day.
I looked out at the students and said, “How did I do?” There was a resounding cheer! They recognized the difference in what I could say – but more importantly in what they could say as a result of thoughtful annotations. Then I asked them to turn to a partner and use their annotations to explain what they’d learned. I probably could have asked them to put away their annotated text and talk about what they’d learned and observed positive results as well. They just understood and remembered the details better.
Phase 3 Meet the Response
I didn’t get a chance to teach this part of the lesson. If I did, I’d definitely ask the students to practice explaining orally what they learned a few times and then to put it into writing. Short, sweet and powerful.
Woohoo!!!! So much fun!!!
Hope this helps.
Originally published January 2019; UPDATED NOV. 2021; revisited 8/5/2025